Implementation Notes:
This example integration was successfully completed using a Nodejs/Express on an Apache/Ubuntu server.
Implementation Note 2:
Steps may differ for different companies and server setups. If you have a remote server already setup, skip Server Setup from scratch and proceed to Apple Pay implementation.
Apple Pay implementation - Retrieve Encrypted Apple Pay Token:
This section will be divided into 2 parts: frontend and backend.
Frontend
How to setup the Apple Pay button on your website.
Steps for HTML
-
Import the Apple Pay SDK. You can accomplish this by adding the following script tag to your HTML file, within the head tag:
<script src="https://applepay.cdn-apple.com/jsapi/v1/apple-pay-sdk.js"></script> -
Include the Apple Pay button:
<apple-pay-button buttonstyle="white" type="plain" locale="en"></apple-pay-button>
Note: you can customize the button either with inline styles or with CSS. More reference here -
Import your CSS file within the head of your HTML file.
-
Import your Javascript file within the head of your HTML file
-
Your resulting HTML file should look something like this:
<!DOCTYPE html><!-- Copyright (c) 2022.   TabaPay, Inc.   All Rights Reserved. -->
<html>
	<head>
		<link rel="stylesheet" href="index.css">
		<script type="text/javascript" src="index.js"></script>
		<script src="https://applepay.cdn-apple.com/jsapi/v1/apple-pay-sdk.js"></script>
	</head>
	<body>
		<h1>Apple Pay Demo</h1>
		<apple-pay-button onclick="onApplePayButtonClicked()" buttonstyle="white" type="plain" locale="en"></apple-pay-button>
	</body>
</html>
Notice the onclick handler with the function onApplePayButtonClicked(). We will define that in the index.js file later in the guide.
Steps for CSS
- Create a CSS file. Do so by executing:
vim index.css - Add any Apple Pay styling you’d like. More reference here
- Save your changes. Enter:
:wq
Click Return - Resulting CSS file should look like the following:
/* Apple Pay Styling */
apple-pay-button {
	--apple-pay-button-width: 150px;
	--apple-pay-button-height: 64px;
	--apple-pay-button-border-radius: 5px;
	--apple-pay-button-padding: 0px 0px;
	--apple-pay-button-box-sizing: border-box;
}
Steps for Javascript
-
Create a Javascript file. Do so by executing:
vim index.js -
To save your changes at any point, enter:
:w
Click Return -
First, you will want to make sure that the user opens your website on Safari. Apple Pay is currently only supported on Safari and the button will not appear elsewhere. You can create / leave custom messages for your users by doing a check on if ApplePaySession exists for the users' browser. The following code example will print if the button is in fact supported or not
if(window.ApplePaySession){ //=================================== // Merchant Identifier should be what is set on Apple Developer website //=================================== let merchantIdentifier = 'yourApplePayMerchantIdentifier'; let promise = ApplePaySession.canMakePaymentsWithActiveCard(merchantIdentifier); promise.then(function (canMakePayments){ if(canMakePayments){ console.log('Apple Pay is supported'); } }) } else { console.log('Please open on a supported browser'); } -
As mentioned in the index.html, you want to define the function onApplePayButtonClicked. Thus, instantiate the function (ES6 syntax was used for this guide)
Within the function onApplePayButtonClicked:
-
When creating an Apple Pay Session, you need to provide 2 pieces of information: version number and payment request. Payment request is a dictionary that contains all the information needed to display the payment sheet. Define that as a variable called ‘request’. More information here. Example request is as follows:
const request = { "countryCode": "US", "currencyCode": "USD", "merchantCapabilities": [ "supports3DS" ], "supportedNetworks": [ "visa", "masterCard", "amex", "discover" ], //=================================== // Customizing touch bar //=================================== "total": { "label": "Demo (Card is not charged)", "type": "final", "amount": "1.99" } }; -
Instantiate a new Apple Pay Session called ‘session’. For the purpose of this guide, pass 3 for the version number and ‘request’ from step 5.
-
In order to use ApplePay, you need to validate that you are an Apple Pay merchant. You initiate this call by using session.onvalidatemerchant.
-
Set session.onvalidatemerchant equal to an anonymous asynchronous function with one parameter event
-
Within the function body, create a variable called ‘merchantSession’. Set that variable equal to the result of a function called ‘validateMerchant’. (We will define validateMerchant in a bit)
-
Pass the parameter event.validationURL to your validateMerchant function.
-
Complete merchant validation by passing merchantSession into session.completeMerchantValidation(). The resulting code should be as follows:
session.onvalidatemerchant = async event => { //=================================== // Call your own server to request a new merchant session //=================================== const merchantSession = await validateMerchant(event.validationURL); //----------------------------------- // Pass opaque merchant object to ApplePaySDK to // complete merchant validation //----------------------------------- session.completeMerchantValidation(merchantSession); }; -
Outside of your function onApplePayButtonClicked, define a new asynchronous function called ‘validateMerchant’.
-
Ensure this function accepts one argument. This will be the validationURL that you need to pass to your backend to call the Apple Pay servers.
-
Create a dictionary to pass to your backend. Add whatever key you want, and ensure the value is the validationURL.
-
Create a POST request using Fetch API
-
If your frontend and backend are on the same IP but different ports, ensure mode: ‘CORS’ is enabled.
-
Return the response in JSON format.
Your function should look like so:const validateMerchant = async (validationURL) => { //=================================== // URL to Apple Pay servers //=================================== const data = {validationURL: validationURL}; //----------------------------------- // POST to backend //----------------------------------- const response = await fetch('yourAPIEndpoint', { method: 'POST', mode: 'cors', headers: { 'Accept': 'application/json', 'Content-Type': 'application/json' }, body: JSON.stringify(data) }); //~~~~~~~~~~~~~~~~~~~~~~~~~~~~~~~~~~~ // Return //~~~~~~~~~~~~~~~~~~~~~~~~~~~~~~~~~~~ return response.json(); //~~~~~~~~~~~~~~~~~~~~~~~~~~~~~~~~~~~ }; -
You can define ApplePayPaymentMethodUpdate if you want to update the payment method for the user. The following code is a template but is not final:
session.onpaymentmethodselected = event => {
  //===================================
  // Define ApplePayPaymentMethodUpdate based on the selected payment method.
  // No updates or errors are needed, pass an empty object.
  //===================================
  const update = {};
  session.completePaymentMethodSelection(update);
};
For this guide, onpaymentmethodselected will not be used.
-
You can define ApplePayShippingMethodUpdate if you want to update the shipping method. For this guide, we can just pass an empty object. More reference here
session.onshippingmethodselected = event => { //=================================== // Define ApplePayShippingMethodUpdate based on the selected shipping method // No updates or errors are needed, pass an empty object. //=================================== const update = {}; session.completeShippingMethodSelection(update); }; -
You can define ApplePayShippingContactUpdate if you want to update the shipping contact. For this guide, we can just pass an empty object. More reference here
session.onshippingcontactselected = event => { //=================================== // Define ApplePayShippingContactUpdate based on the selected shipping // contact //=================================== const update = {}; session.completeShippingContactSelection(update); }; -
You need to define behavior when the user has authorized the Apple Pay payment with Touch ID, Face ID, or a passcode.. You can do this by accessing ‘onpaymentauthorized’ event handler in ‘session’. More reference here
-
Set session.onpaymentauthorized equal to an anonymous function. It will have one param called ‘event’
-
Within the anonymous function body, you can define custom status codes and checks. For the purpose of this guide, we only define a success via a dictionary.
-
Pass the dictionary to session.completePayment(). The resulting code should look as follows:
session.onpaymentauthorized = event => {
  //===================================
  //Define ApplePayPaymentAuthorizationResult
  //===================================
  const result = {
    "status": ApplePaySession.STATUS_SUCCESS
  };
  session.completePayment(result);
};
Note: You will access the encrypted ApplePayPaymentToken within this event listener via event.payment.token
-
You can define ApplePayCouponCodeUpdate if you want to update the coupon code. Pass a dictionary to session.completeCouponCodeChange(). More reference here
-
You need to define behavior for if the session is cancelled by WebKit. For this guide, we can just have the function empty.
-
You need to begin the ApplePaySession. Do so by calling begin() on your ‘session’ object like so:
session.begin(); -
The resulting index.js should look like so:
//***********************************
// Copyright (c) 2022.   TabaPay, Inc.   All Rights Reserved.
//***********************************

//***********************************
// Checks if Apple Pay JS API is available in browser
// Shows button if true, else prompts user to open in Safari
//***********************************
if(window.ApplePaySession){
  //===================================
	// Merchant Identifier should be what is set on Apple Developer website
	//===================================
	let merchantIdentifier = 'yourApplePayMerchantIdentifier';
	let promise = ApplePaySession.canMakePaymentsWithActiveCard(merchantIdentifier);
	promise.then(function (canMakePayments){
		if(canMakePayments){
			console.log('Apple Pay is supported');
		}
	})
} else {
	console.log('Please open on a supported browser');
}

const validateMerchant = async (validationURL) => {
  //===================================
  // Function that contacts server, requests session from AP server,
	// then returns an opaque merchant session object
  //===================================
	const data = {validationURL: validationURL};
  //-----------------------------------
	// POST to backend
  //-----------------------------------
	const response = await fetch('yourAPIEndpoint', {
		method: 'POST',
		mode: 'cors',
		headers: {
			'Content-Type': 'application/json'
		},
		body: JSON.stringify(data)
	});
	//~~~~~~~~~~~~~~~~~~~~~~~~~~~~~~~~~~~
	// Return
	//~~~~~~~~~~~~~~~~~~~~~~~~~~~~~~~~~~~
	return response.json();
	//~~~~~~~~~~~~~~~~~~~~~~~~~~~~~~~~~~~
};

//***********************************
// Event listener for when Apple Pay button is clicked
//***********************************
const onApplePayButtonClicked = () => {
  //===================================
	// Customizations
	//===================================
	const request = {
		"countryCode": "US",
		"currencyCode": "USD",
		"merchantCapabilities": [
			"supports3DS"
		],
		"supportedNetworks": [
			"visa",
			"masterCard",
			"amex",
			"discover"
		],
    //-----------------------------------
		// Customizing touch bar
		//-----------------------------------
		"total": {
			"label": "Demo (Card is not charged)",
			"type": "final",
			"amount": "1.99"
		}
	};

	//===================================
	// Create ApplePaySDK instance
	//===================================
	const session = new ApplePaySession(3, request);

  //===================================
	// As soon as the system displays the payment sheet, the Apple Pay JS
	// API calls your session object’s onvalidatemerchant event handler
	// to verify that the request is coming from a valid merchant.
	//===================================
	session.onvalidatemerchant = async event => {
		//-----------------------------------
		// Call your own server to request a new merchant session
		//-----------------------------------
		const merchantSession = await validateMerchant(event.validationURL);
    //-----------------------------------
		// Pass opaque merchant object to ApplePaySDK to
		// complete merchant validation
		//-----------------------------------
		session.completeMerchantValidation(merchantSession);
	};

	//===================================
	// Event handler to call when user selects a shipping method
	//===================================
	session.onshippingmethodselected = event => {
		//-----------------------------------
		// Define ApplePayShippingMethodUpdate based on the selected shipping method
		// No updates or errors are needed, pass an empty object.
		//-----------------------------------
		const update = {};
		session.completeShippingMethodSelection(update);
	};

	//===================================
	// Event handler to call when user selects a shipping contact
	// in the payment sheet
	//===================================
	session.onshippingcontactselected = event => {
		//-----------------------------------
		// Define ApplePayShippingContactUpdate based on the selected shipping
		// contact
		//-----------------------------------
		const update = {};
		session.completeShippingContactSelection(update);
	};

  //===================================
	// An event handler the system calls when the user has authorized
	// the Apple Pay payment with Touch ID, Face ID, or a passcode.
	//===================================
	session.onpaymentauthorized = event => {
		//-----------------------------------
		//Define ApplePayPaymentAuthorizationResult
		//-----------------------------------
		const result = {
			"status": ApplePaySession.STATUS_SUCCESS
		};
		session.completePayment(result);
	};

  //===================================
	// An event handler called by the system when the user
	// enters or updates a coupon code.
	//===================================
	session.oncouponcodechanged = event => {
    //-----------------------------------
		// Define ApplePayCouponCodeUpdate
		//-----------------------------------
		const newTotal = calculateNewTotal(event.couponCode);
		const newLineItems = calculateNewLineItems(event.couponCode);
		const newShippingMethods = calculateNewShippingMethods(event.couponCode);
		const errors = calculateErrors(event.couponCode);

		session.completeCouponCodeChange({
			newTotal: newTotal,
			newLineItems: newLineItems,
			newShippingMethods: newShippingMethods,
			errors: errors
		});
	};

	session.oncancel = event => {
		//-----------------------------------
		// Define behavior when payment cancelled by WebKit
		//-----------------------------------
	};

	//===================================
	// Start up SDK
	//===================================
	session.begin();

};
Your frontend is now setup!
Backend
Backend prerequisite
Ensure you have a Merchant Identity Certificate in pem format for TLS between backend and AP servers
- Create a certificateSigningRequest
- Note: The file generated needs to be of format “.certSigningRequest”
- On Apple Developer website, under Apple Pay Merchant Identity Certificate, click Create Certificate
- Upload this “certSigningRequest” file
- Download the resulting .cer file
- Open the .cer file in Keychain Access application
- Export both the crt and key files as a .pem file
How to setup
How to setup your backend to call Apple Pay servers for merchant validation. Note: this guide assumes frontend and backend are on different IPs. However, they can be on the same IP so long as you enable CORS.
-
Create a server.js file. This will contain your backend code.
-
Update your package.json file to run server.js instead of index.js in scripts → start
-
Your backend needs to connect to Apple Pay servers with HTTPS. Node.js imports are of the syntax var = require('yourModule'); Thus, to import HTTPS, use the following code:
let https; try { https = require('https'); } catch (err) { console.log('https support is disabled'); } -
You need to make sure your remote server supports HTTPS. By default, it will only support HTTP. Follow the steps here to secure your remote server with HTTPS.
-
You will need a way to access the FileSystem to read your key/certificate pair for HTTPS. Import the module fs
const fs = require('fs'); -
You need to import express module to write API endpoints more cleanly.
const express = require('express'); -
Instantiate an instance of express. For this guide, the instance will be called app.
const app = express(); -
Instantiate an instance of axios. Axios will be needed when we create our POST request to Apple Pay servers.
const axios = require('axios').default; -
Create a dictionary containing your key and certificate pair. This pair will identify you as the owner of the domain and allow you to establish HTTPS connections.
const credentials = { key: fs.readFileSync('/path/to/key/<Your domain>.key'), cert: fs.readFileSync('/path/to/cert/<Your domain>.crt') }; -
You will want to parse incoming requests with JSON payloads. Use the following Express middleware to do just that:
app.use(express.json()); -
We need to create the API endpoint that the frontend will call and pass the validationURL. Create an Express endpoint like so:
app.post('/applePayMerchantVerification', (req,res,next) => { } -
Within the API endpoint body, you need to use an https.Agent to establish TLS handshake (or HTTPS) between your backend and Apple Pay servers. The required parameter is a dictionary containing a key/certificate pair. Both have to be set to your .pem files that you got from the backend prerequisite
//********************************** // CERTS REQUIRED FOR TLS HANDSHAKE BETWEEN BACKEND AND APPLE PAY SERVERS //********************************** const agent= new https.Agent({ cert: fs.readFileSync('/path/to/pem/<filename>.pem'), key: fs.readFileSync('/path/to/pem/<filename>.pem'), }); -
Now, we write the POST request to Apple Pay servers
axios({ "url": req.body.validationURL, "httpsAgent": agent, "method": "post", "headers": { 'Accept': 'application/json', 'Content-Type': 'application/json;charset=UTF-8' }, "data": { "merchantIdentifier": "<Your merchant identifier>", "displayName": "Sandbox Demo", "initiative": "web", "initiativeContext": "<Your FQDN>" } }) //=================================== // Send response back to frontend //=================================== .then(response => res.send(response.data)) .catch(err => console.error(err)); -
Line 2 is the validationURL you passed from the frontend
-
httpsAgent on Line 3 allows HTTPS to be established
-
Lines 10 - 13 is the required POST body for Apple Pay.
-
Replace your merchantIdentifier with the one you created in your Apple Developer account.
-
displayName on line 11 is what you want to be shown on the Touch Bar when a user initiates an Apple Pay transaction
-
initiative on line 12 should be “web” since Apple Pay is being used on the web.
-
initiativeContext on line 13 is your Fully Qualified Domain Name (FQDN) that was verified by Apple.
-
Line 17 is sending the response from Apple Pay servers back to your frontend.
-
Line 18 is a catch block for if there are any errors when trying to POST to Apple Pay.
-
Lastly, you need your HTTPS server to be listening on a port. If your server is not listening, then your frontend can’t call it.
https.createServer(credentials, app).listen(1234); -
Here, your server will listen on port 1234, use your SSL certificates to establish HTTPS with your frontend, and use your Express app for endpoints.
-
Your resulting server.js file should look like:
//***********************************
// Copyright (c) 2022.   TabaPay, Inc.   All Rights Reserved.
//***********************************

//****************************
// Apple Pay Express Server
//****************************
let https;
try {
	https = require('https');
} catch (err) {
	console.log('https support is disabled');
}
//********************************************************
// Imports for system file reading and server implementation
//********************************************************
const fs = require('fs');
const express = require('express');
const app = express();
const axios = require('axios').default;

// **************************** //
// SSL Certs to establish HTTPS
// **************************** //
const credentials = {
  key: fs.readFileSync('/path/to/key/<Your domain>.key'),
  cert: fs.readFileSync('/path/to/cert/<Your domain>.crt')
};

// ******************************************** //
// To parse incoming requests with JSON payloads
// ******************************************** //
app.use(express.json());

// ********************************************** //
// API ENDPOINTS
// ********************************************** //

//===================================
// Endpoint for Apple Pay Merchant Verification
//===================================
app.post('/merchantVerification', (req,res,next) => {
  //-----------------------------------
  // Certs required for TLS Handshake between Backend and Apple Pay Servers
  //-----------------------------------
	const agent= new https.Agent({
		cert: fs.readFileSync('/path/to/pem/<filename>.pem'),
		key: fs.readFileSync('/path/to/pem/<filename>.pem'),
	});
  //-----------------------------------
  // POST to Apple Pay servers
  //-----------------------------------
  axios({
		"url": req.body.validationURL,
		"httpsAgent": agent,
		"method": "post",
		"headers": {
			'Accept': 'application/json',
      'Content-Type': 'application/json;charset=UTF-8'
    },
		"data": {
			"merchantIdentifier": "<Your merchant identifier>",
			"displayName": "Sandbox Demo",
			"initiative": "web",
			"initiativeContext": "<Your FQDN>"
		}
	})
  //~~~~~~~~~~~~~~~~~~~~~~~~~~~~~~~~~~~
  // Send response back to frontend
  //~~~~~~~~~~~~~~~~~~~~~~~~~~~~~~~~~~~
	.then(response => res.send(response.data))
	.catch(err => console.error(err));
});

// ********************** //
// HTTPS SERVER LISTENING ON PORT 8001
// ********************** //
https.createServer(credentials, app).listen(1234);
Your backend is now setup!
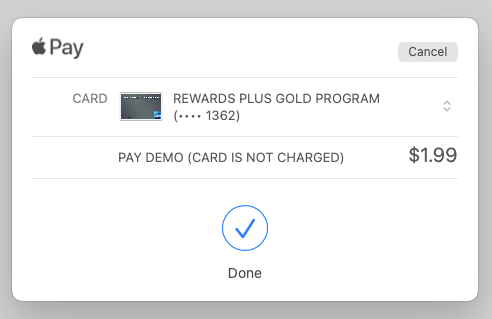
Running Apple Pay demo
- Run npm start to fire up your backend
- Go to your domain page with your Apple Pay button
- Click your Apple Pay button
- Double-click your Touch ID
- Enter the prompted password
- Transaction will be successful!